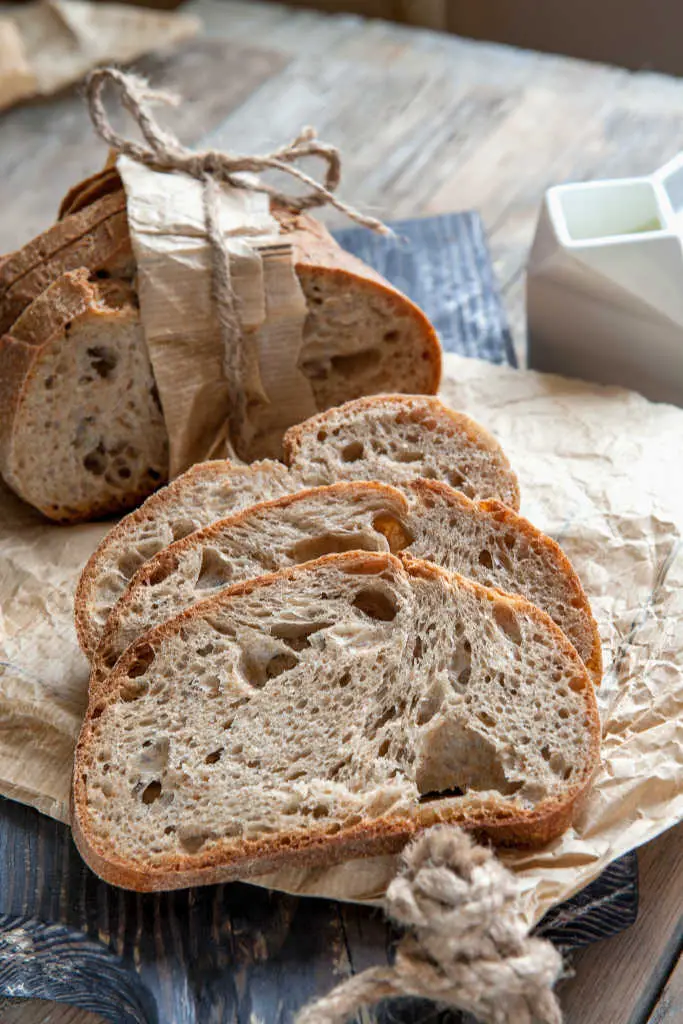
Over the years, I’ve tried different sourdough bread recipes, but I seem to be always coming back to this one. I like that it’s a relatively simple recipe, so even if you are a beginner you can follow the recipe with good results.
To bake this sourdough bread recipe, you need to have an active sourdough starter. If you don’t, here is my favourite sourdough bread starter recipe and a sourdough starter troubleshooting guide. The most important thing is that your sourdough bread starter is vigorously bubbling before you add it to your sourdough bread mix.

Depending on how vigorous your sourdough starter is (and how warm or cold your kitchen is), you might need to adjust the gaps in between each stage.
I hope you enjoy baking this sourdough bread, believe me, this bread is worth the wait!
This recipe is ideal if you are planning to bake your bread towards the end of the second day and you have the time to start the bread the day before. Please don’t worry if this sounds a bit scary at first, all you have to think about is to be around the kitchen for few minutes at a time to attend your sourdough bread and the rest of the time the bread can be left on its own!
To help you to plan this recipe, you can follow this time table:
10 minutes to mix everything together (no kneading needed at this stage)
12-14 hrs resting time (perfect for leaving overnight)
15 minutes to add more flour and knead your sourdough bread
1 hr resting/proving time
5 min of dough folding
1 hrs resting/proving time (in the bowl)
5 min dough folding
1 hrs resting/proving time (in the bowl)
5 min dough folding
1 hrs resting/proving time (in the bowl)
5 min dough folding & shaping the dough to its final shape
2-3 hrs final proving (in a bread basket) – in room temperature or
8-10 hrs of proving in the fridge
30-40 min baking
More sourdough bread recipes
- Vegan Sourdough Pancakes >>
- Sourdough Blueberry Pancakes >>
- Quick sourdough bread recipe without sourdough starter >>
Sourdough Bread Baking Tips & Techniques
Leaving the sourdough bread to rise in the fridge (Achieving longer fermentation)
Sometimes it is more practical to bake the sourdough bread in several stages. After you’ve shaped your dough for the final stage, instead of leaving it to prove on a kitchen counter, place it in your floured bread basket (and cover with a plastic bag) and put in the fridge. The dough will rise and double in size in about 8 hrs. You can safely leave the dough overnight or prepare it in the morning and go out for the whole day.
This way, the sourdough bread will taste even better (more delicate and softer), because the rising of the dough is done very slowly. You will notice it, especially with white sourdough bread.
Creating higher rise when baking
Create steam, when putting your bread in, by placing baking tin at the bottom of your oven before you preheat the oven. Have either ice cubes or boiling water ready and as soon as you place the bread in the oven, throw the ice cubes on the tray (or pour the water). Shut the door really quickly and be careful when you do this. The steam softens the top of the dough, which allows it to rise even more in the oven. You can also use flower spray can and just mist the top of your bread as it goes in the oven.
Cutting the top of your bread
Slashing the top of your bread, not only adds an extra rustic look to your bread but also serves a very practical purpose. The cuts need to be only 1 cm deep and can be done by a sharp knife, craft knife or specialist bread razor. Do this fairly quickly and do not allow the knife to drag the dough. Once in the oven, the cuts allow the bread to rise even more.
Storing your bread
To store your sourdough bread, keep it in the bread tin in either paper or plastic bag. You can also purchase or make specialist bread bags, which are made from a lightly perforated plastic bag inside a cotton cloth bag. This allows the bread to breathe without drying it out too much.
Sourdough bread freezes really well and it is well worth making a few loaves at a time.
Efficient Sourdough Baking
This basic recipe can easily be doubled and you should still be able to knead the dough easily. Then just divide the dough to fit your tins or bread baskets.
Bread Baking Baskets or Tins
If you fancy the look of rounded bread, you don’t need to invest in proving baskets. You can use any suitable big bowl, place floured clean tea towel inside and then place your bread in for the second rising (make sure, that the tight part of the bread is at the bottom of the bowl). When doubled in size, turn your bread carefully on a baking tin and then bake as usual.
The use of different flours
To adapt the basic recipe for the use of wholemeal bread flour or any other stoneground bread flour, use between 100 – 200g of wholemeal bread flour and the rest of strong bread white flour. The more wholemeal flour you add the darker and potentially dense the bread will be. This is because wholemeal and stoneground flour has less gluten than white bread flour.
You will also need to increase the volume of water from 300ml to up to 400 ml, depending on how much you add of the wholemeal flour. This is because wholemeal flour absorbs more water than white flour.
Checking that the bread is done
Always check that the bread is baked through by tapping at the bottom of the bread. If it sounds hollow – it is done. If not, put the bread back into the oven (without the tin).
Cool bread on a wire rack and do not cut until it is cool. This is really important because bread is still ‘baking’ when you take it out of the oven. This is caused by the hot air coming out of the bread and finishing the baking process. If you cut the bread too early, it will get quite squashed up inside and will look as if it has not been baked correctly.
The cooling rack is also important, as the hot air needs to escape through the bottom as well. If you leave it just on the surface of your kitchen top, you will end up with soggy bottom (of the bread, of course).
Sourdough Bread Baking Resources
- What to do with discarded sourdough starter >>
- Is sourdough gluten free? >>
- Is sourdough easier to digest ? >>
- Bread Baking Tips & Troubleshooting >>
- The essential bread baking equipment to get you started >>
- What to do if you bread sticks to your baking tins >>

Sourdough Bread Recipe
Ingredients
First mixing
- 250 g strong white bread flour
- 300 ml lukewarm water
- 100 ml/grams of sourdough starter
Next day mixing
- 300 g strong bread flour
- 12 g salt
Instructions
- In a large bowl mix together 250 g of strong bread flour, 300 ml warm water and a 100 ml/grams of your sourdough starter, cover with a plastic bag and leave somewhere warm overnight or for at least 8-14 hrs.
- The next day add 300 g of strong bread flour and 12g salt and kneed as normal. The dough will be quite sticky. Form tight round and leave to rise in the bowl.
- After about 1hr, tip out the dough, lightly stretch the dough and form it back to a tight round. Leave it to rise for another hour.
- Repeat the process once or twice, depending on how much time you have and how strong your sourdough bread starter is.
- When you are ready for the final shaping of the dough, fully deflate the dough with your hands and shape into one large or two smaller loaves.
- Leave the dough to rise until it doubles in size (this time it might take anything from 1 hr to 4 hrs).
- Carefully place the dough on a baking tray and slash the top with a knife at this point.
- The oven should be as hot as you can make it (250 C) and after 10 mins reduce it to about 200 C. Bake for about 35 mins (in total) and check by tapping on the bottom of the bread, to see when it is ready.
- Cool on wire rack.


I really wanted to bake sourdough bread, but I always found it confusing. My friend gave me a sourdough starter, so I wanted to try to bake the bread myself. Thank you so much for sharing the timetable for baking, that was really useful for me as a beginner.