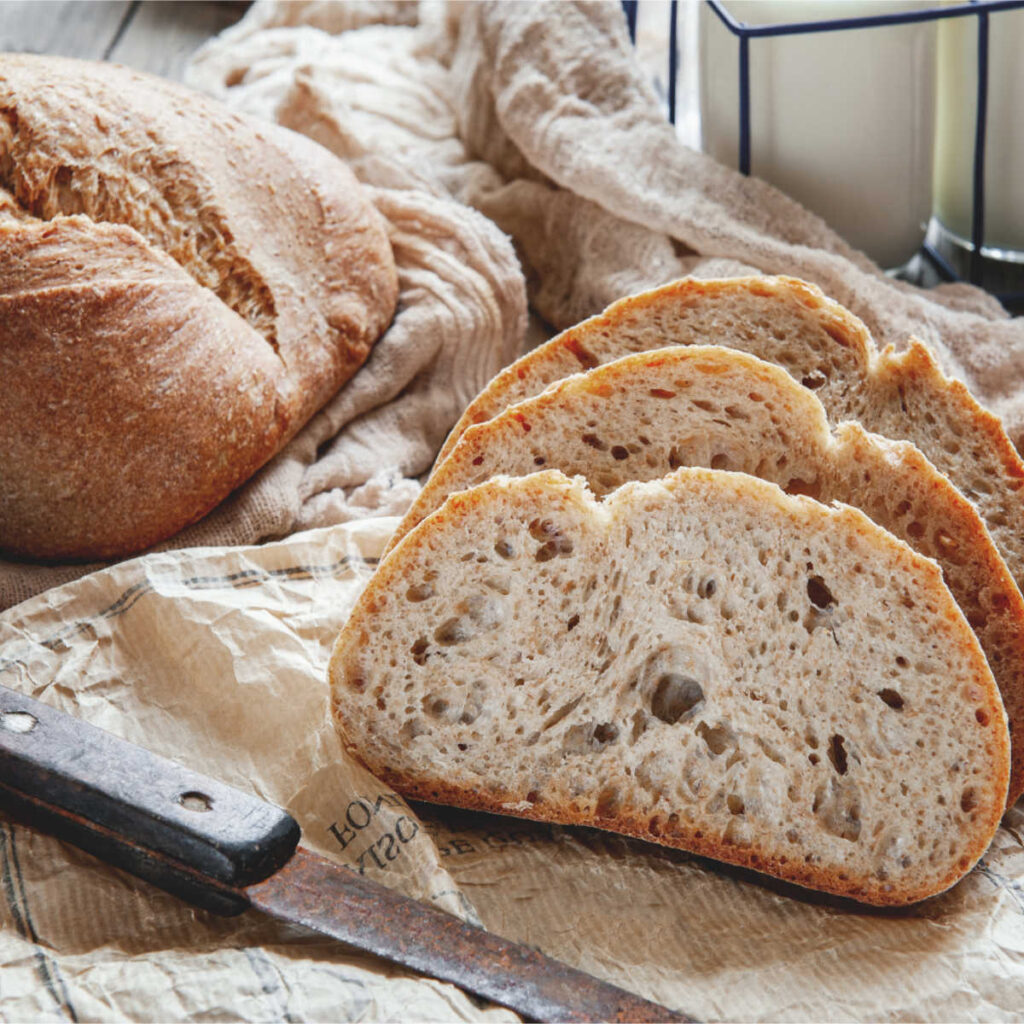
Easy no-knead bread recipe baked without a Dutch oven, which works with any bread flour. I have included my favourite overnight (or day) recipe version with plenty of tips on how to make a great bread without much work.
Why make this recipe?
- Easy to make
- No kneading required (perfect if you can’t knead bread or don’t want to)
- Light and soft bread with a good crust
- No need for Dutch oven
What exactly is ‘No-Knead’ Bread?
As the title suggest, no knead bread doesn’t require any dough kneading or long folding or mixing. This makes it a great bread recipe for anyone who perhaps can’t physically knead bread or find it’s getting a bit of a struggle to do so.
It’s also a perfect bread recipe to make if you don’t have a space for bread kneading (if you are for example camping) or dare I say, you don’t fancy spending 10 minutes kneading bread!
The magic of ‘no kneading’
The reason why ‘no knead’ bread recipe actually works is because of a much higher amount of water and much longer proving time. The water has the same impact as physical kneading on the dough, but it needs to do its magic over a much longer period than kneading.
So, usually, you’d knead your bread for about 10 minutes, which wakes up the gluten and makes the bread nice and strong. It takes the water about 12 hrs to do the same job.
This is pretty mind-blowing stuff, isn’t it? So, why even bother kneading bread, if it works so well?
There are, of course, good reasons why you can’t use this bread baking method every time. The ‘no knead’ bread takes a considerably longer time. The increased water amount means that the bread is not as easy to shape as your ‘normal – kneaded’ bread, so you can’t make bread rolls, baguettes or any other fancy shapes.
What makes this recipe work
Time and water! Don’t try to skip too much of either of these!
I often add more water than this no knead bread recipe has (say 420 – 450 ml instead of 380 ml) and it results in a lovely soft bread.
Time saving tip – the same day version
If you follow my basic recipe, you’ll need about a minimum of 12 hrs to complete the bread baking process. This includes everything from the initial mixing, proving, shaping and then baking.
If you want to speed up the process and still make ‘no knead’ bread, here is what to do.
How to speed up the gluten development using the scalded flour method
This method cuts down the initial proving stage down to 2-3 hrs (instead of 8-10) and cuts down the second proving to about 1 hr (instead of 2-3 hr).
Separate 200g of flour from your 500g of bread flour mix. Put the flour in a heatproof bowl and pour 300 ml of freshly boiled water over it. Stir everything together, it will be a consistency of a thick porridge, but that’s exactly what it should look like.
Cover and leave for at least 60 minutes. You can leave it for longer, the dough only improves in time.
I know that this step sound pretty crazy from a baking point of view.
Why pour boiling water over flour?
What’s actually happening right now, is that the boiling water is awakening the gluten in the flour and basically supercharging it.
Sounds like a sci-fi film, doesn’t it? But if you know your baking, you’ll know that when the bread goes in the oven, the first 5-10 minutes the bread rises and grows. This is caused by the expanding gluten reacting to the heat of the oven.
What we are doing right now with our boiling water is making the gluten to expand at the beginning of our baking process. Clever, right?
Now, once you are ready (and the flour & boiling water had at least 60 minutes rest), add the rest of the flour (300g), 1 ½ teaspoon of dry yeast (yes, we are increasing the amount here), 1 ½ teaspoon of salt, teaspoon of sugar (if you want to) and about another 100 ml of water.
Note about the extra water for the second mix.
The final mix should be still very much sticky dough, much stickier than normal bread dough. This means that if you add 100 ml and it’s still not sticky enough add a bit more.
Cover and leave for another hour or until it doubles in size. Then follow the recipe below for shaping, final dough rise and baking.
I hope I didn’t confuse you too much with this version of the no-knead recipe and as ever if you have any questions, let me know and I’ll do my best to answer it.
Pro tip
For even softer bread use more water
To speed up the process use the scalded flour bread baking technique (see notes below)
Reasons for using dutch oven for baking
And where does the dutch oven come into all of this?
Dutch ovens, aka large cast-iron casserole dishes, are great for baking any kind of bread. The idea is that you leave your dutch oven to heat up in the oven, then place your bread in, put it back in the oven with a lid on and bake the bread as normally (taking off the lid halfway through the baking to get a nice crust on your bread).
The reason why so many people rave about using dutch ovens is because our domestic ovens can only go up to 250C (more or less), whereas commercial ovens are more like 320-350C.
The difference in temperature is also, unfortunately, the difference in the bread rise. The hotter the temperature, the higher the bread rise.
The dutch oven iron absorbs the heat from the oven and makes the temperature inside slightly higher than your highest oven temperature.
Still with me?
Great….
So, not using a dutch oven will only result in slightly lower bread rise, but to be honest, your bread baking technique is probably more important than using a fairly pricey piece of bread baking equipment. Your bread will still be amazing and much better than anything you can buy from supermarket.
What to use instead of a dutch oven
I don’t own a Dutch oven, so I bake my ‘no knead’ bread in an oven proof glass pyrex dish. I pre-heat it as if it was a Dutch oven and use it with a pyrex dish lid. It works perfectly fine, but it’s obviously not as thick as cast iron, so the temperature is slightly lower than if it was a dutch oven.
No matter what you use, you will need some sort of receptacle that’s suitable for oven baking. This bread has a lot of water in, and it won’t hold its shape very well, so it needs something to contain it!
- Cast iron casserole dish (with or without a lid)
- Deep roast tin
- Ovenproof pyrex dish
- Ceramic lasagne baking tray
- Large cake baking tin (for round bread)
- Bread Tin (for sandwich bread style)
If your container has a lid, that’s great, but don’t worry too much if it doesn’t. I’ve used basic bread tin (with no lid) and baked a really great sandwith loaf.
The lid helps to keep the temperature inside the caserrole or dish higher than the rest of the oven, which gives your bread extra rise. It’s a good enough reason to use something with a lid to bake your bread in, but not good enough reason not to bake this bread if you don’t have the right baking equipment – just bake in whatever you have!
Ingredients & Possible Substitutions
Flour
You can use any bread flour you like with this recipe; it really depends on what bread you like to eat. The flour/water ratio in this recipe is based on white bread flour, so if you are using a mix of wholemeal flour, just add more water. The wholemeal grains soak up more water, and you don’t want your bread to be dry.
Good bread flour combinations are
500g white bread flour for rustic white loaf
250g white bread flour & 250g wholemeal flour for more wholemeal bread with the lightness of white flour.
400g white bread flour, 100g rye bread flour, 2 teaspoons of caraway seeds, brown sugar for dark, earthy bread full of flavour.
400g white bread flour & 100g wholemeal flour, 2 tablespoons of mixed seeds for light seeded bread.
Yeast
I’ve used instant quick yeast in this recipe, simply because it’s easily available in most supermarkets and simple to use.
Salt
Any kind of salt will do, but I like to use flavoured, smoked or different sea salts with herbs in my breads. This all depends on what flavour I want to achieve.
Sugar
Sugar adds flavour to your bread and it’s completely optional. I would use white sugar with white bread flour and brown or molasses sugar with wholemeal breads. You can also use honey, maple syrup, carob or date syrup.
Water
The more water you manage to add to this recipe, the lighter the bread is going to be. You can also use milk or a half yogurt and half water, which ads extra flavour to the bread.
The method – Instructions
STEP 1 – Mix your bread dough
In a large bowl, mix together flour, yeast, and salt.
Stir in water and mix with a wooden spoon until it forms a very wet dough. Make sure that all flour is incorporated and there is no dry flour in your mix.
STEP 2 – Leave the bread to prove
Cover the bowl loosely with plastic wrap or a towel and let it rise at room temperature for 8 -10 hours. The bread can be easily left for longer, but don’t overproof it.
STEP 3 – Shape your dough
After the first rise, spread a little vegetable oil on to the work counter and turn the dough out onto your work surface. Oil your hands and fold the dough over itself a few times to shape it into a ball. It will be very sticky, so use a bread scraper to help you.
STEP 4 – Decide on what to bake your bread in
You can shape your loaf and place it directly to your final baking receptacle or you can leave the dough to proof on the work counter whilst you heat up your baking receptacle and then transfer the bread to it when it rises for the second time.
If I’m perfectly honest, I would only choose the second version if I have something really thick to heat up (cast iron dish or similar).
For anything else (e.g. bread tin or cake tin) the difference in rise is going to be negligible, but the faff of trying to move the risen bread to a very hot bread tin, whilst trying not to deflate it is going to be super difficult.
STEP 5 – Shape the loaf and leave to rise again
If you decide to leave the bread to rise for the second time on the work counter, oil the work counter and place the bread closer to the edge and cover with a plastic bowl.
That way, it’s easier to slide it into the hot casserole dish or whatever you are using. Ask for help at this stage, because it’s really tricky to hold a very heavy & hot dish and manoeuvre the bread in at the same time.
You can also leave the bread to rise on an oiled non-stick baking paper and then transfer it to the casserole dish by lifting the bread in.
Whatever you decide to do, shape your bread and leave to rise for the second time until it doubles in size. This could take an hour, but it could be much longer. The lenght of time depends on what type of flour you’ve used and how warm your kitchen is.
STEP 6 – Preheat your oven
If you are heating your cast iron casserole or pyrex dish (in my case), make sure that your oven is on the hottest setting and the dish is in the oven for about 30 minutes for anything with thick walls (cast iron casserole dish) or at least 10 minutes for thinner things like pyrex dish or a baking tin.
STEP 7 – Bake your bread
When your bread is ready, place it in your chosen receptacle, cover with a lid (if you have one) and bake for 20-25 minutes. After this time remove the casserole lid and bake until the crust is a nice brown colour. This could take another 10-15 minutes.
Carefully remove your bread loaf from the baking tin or whatever you are using and cool on a wire rack for at least 30 minutes before slicing.
Notes on oven temperature
I always try to heat up the oven as high as I can. Mine goes up to 250C.
If you already have something in the oven, say you are roasting potatoes on 220C, stick the bread in at the same time, it will be just fine!
Obviously the higher temperature the better, but equally if you are baking bread you want to utilise your oven and save energy at the same time.
How to store no-knead bread
I store my bread in a loose paper bag and in a tin bread bin. If I know I’m not going to finish eating the bread within 2 days, I usually freeze whole or at least half of the bread. It keeps 3-6 months in the freezer without any problems.
Loaf size
This is a standard loaf of bread, which (depending on how you bake it) should give you about 12-15 slices of bread (or more).
Scaling up or down this recipe
You can easily make smaller loaf by halving all the ingredients. The thing is that the proving time won’t half too. It will take considerablly less time, but not so much to make it worh swiching on the the oven.
Much better idea is to double or tripple this recipe and then make 2 or 3 loaves instead of just one. Standard oven could take 3 large loaves with two oven shelves (2 loaves on each shelf and the 3rd one at the bottom of the oven. If you move them around as you bake, they will bake evenly.
This way, you’ll have three breads instead of one in the same time and the cost of electricity or gas for the oven will be the same too. What you don’t eat straightaway, freeze on the same day.
This recipe and me
For the last twenty years, I’ve been baking my bread using the traditional method of kneading bread dough, leaving to prove twice, shaping it and finally baking it in a standard domestic oven.
But until recently, I’ve never tried the ‘no knead’ bread. I have to say, I was a bit sceptical, thinking to myself that if not kneading your dough was the way to go, why would anyone even knead bread dough anymore?
Surely ‘no knead’ bread can’t be as good as the traditional bread? The kneading is essential as it awakens the gluten in bread flour, which is what makes the dough so elastic and holds its shape when your bake it.
If you read my other bread recipes on this blog, you already know that there is a bit of science behind bread baking and every element of the bread baking method has its purpose and reason.
With this in mind, let me finally let you on this bread baking secret!
Why not stay in touch…
I hope you enjoy making this recipe and if you do, I’d love to know what you think! Let me know in the comments below or find me on Instagram or Facebook and add the hashtag #cocoaandheart so that I can see your post.
Or why not subscribe to my weekly newsletter with new recipes and baking tips straight to your mailbox.
Magdalena
This recipe was originally written on 25 April 2020 and last tested and updated on 14 November 2021
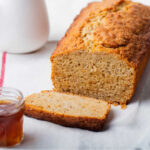
No-Knead Bread without a Dutch oven
Ingredients
- 500 grams white strong bread flour
- 1/2 teaspoon active dry yeast
- 1½ teaspoon salt
- 1 teaspoon sugar optional
- 380 ml water
- Extra flour for dusting
- Vegetable or Sunflower Oil for shapping
Instructions
- In a large bowl, mix together the white bread flour, yeast, and salt.
- Add water and mix with a wooden spoon until it forms a very wet dough. Make sure that all flour is incorporated and there is no dry flour in your bread mix.
- Cover the mixing bowl loosely with plastic wrap or a tea towel and let it rise at room temperature for 8 -10 hours.
- After this long period of bread prooving, spread a little vegetable oil on to the work counter and turn the dough out onto your work surface.
- Oil your hands and fold the dough over itself a few times to shape it into a ball. It will be very sticky, so use a bread scraper to help you.
- Shape your loaf as best you can or at least fold it several times and tighten it and place it directly to your final baking receptacle or leave the dough to proof on the work counter whilst you heat up your baking receptacle and then transfer the bread to it when it rises for the second time.
- After about another 1-2 hrs preheat your oven to the highest setting.
- Place your bread in the oven, add steam or ice cubes or cold water and initially bake for 10 minutes on high temperature.
- Turn down your oven to about 180-200 (350 – 375 F) depending on how quickly the bread browns.
- Bake about 35 – 40 minutes in total.
- To check that your bread is done, turn it upside down and knock. If the bread sounds hollow, it's ready.
- Cool down on a cooling rack.


Leave a Reply