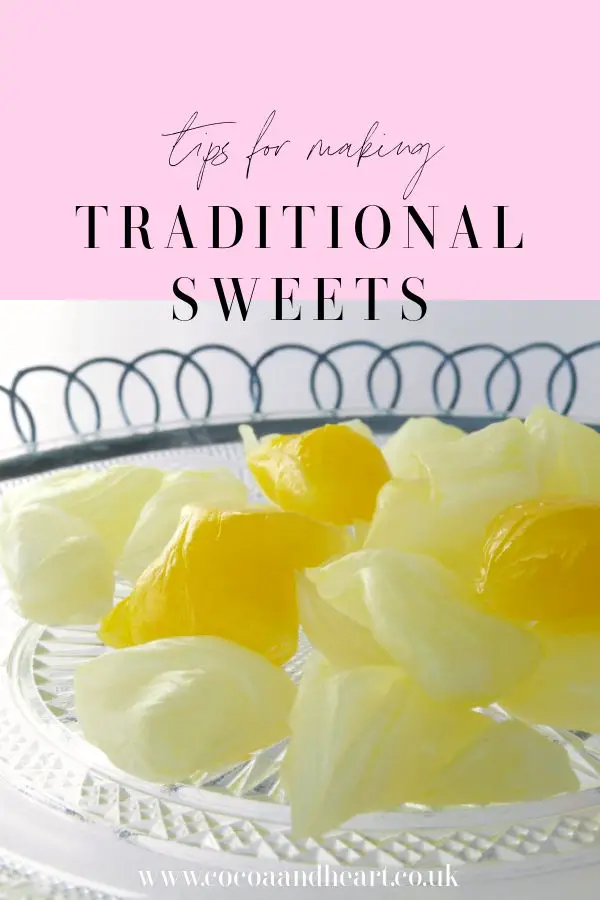
I've always been interested in traditional confectionery - pretty much all of my life I was on a quest for the perfect sweets, chocolates or bonbons. And I was always fascinated about the process of sweet's making and it was partly the reason why I founded Cocoa & Heart a few years back.
All those demonstrations at seaside sweet's shops of how to make a stick of rock got me thinking, that perhaps I could have a go myself. And I did - successfully - made several batches of boiled sweets and now you can have a go too, following my step by step boiled sweets recipe tutorial.
If it still sounds a bit scary, I also run day one to one masterclass where I can take you through how to make traditional boiled sweets and other confectionery at home, step by step.
Why make this recipe?
- Basic recipe that can be made with different flavours
- Great introduction to traditional sweet making
- Cheap to make
My top tips on making this recipe successfully the first time round
Don't change the recipe/ ingredients
Measure everything using digital scales, including the water
Measure the temperature with digital thermometer on the side of the pan and slightly of the bottom off the pan (to get you the right reading)
When all your ingredients are dissolved, bring them up to the desired temperature as quickly as possible
Don't stir the boiling sugar (this will make the mixture to re-crystalise)
If your boiled sweets are too hard to pull, heat them up again the microwave or keep them under a heated lamp.
Be super careful when handling the hot sugar - use special confectionery gloves (treated with vegetable oil) or make sure that your hands are always oiled and don't tough the sugar until you are comfortable with the temperature.
The sugar is very hot in the middle even when the outsides appear to be cooler. This is especially the case, when you use microwave to warm up the mixture.
Boiled Sweets Equipment
The good news is that you don't need much to start making your own sweets at home. I would say, that thermometer is the most important, because the temperature needs to be right for this recipe to work.
In the past I've used successfully pastry mats from heatproof material instead of marble slab, but it's handy to have the cold surface that the marble or granite stone has. You'll also need something to move the very hot mass of sugar around, which is where the palette knife or at least a regular eating knife comes in.
Previously I've used regular craft scissors (I only used them in the kitchen), but it's better to have something sturdier.

- Marble slab (or large granite or marble chopping board, don't try to use anything else or it will melt)
- Large pan
- Thermometer (for making jams or digital thermometer)
- Palette knife or two
- Strong kitchen scissors

Ingredients
Unlike my baking recipes, traditional sweet recipes usually don't lend themselves to substitutions.
Measure everything with a digital scales to make sure your recipe comes out as it should and don't substitute the ingredients. If you do, you might end up with the completely different type of sweets.

- granulated sugar
- water
- liquid glucose
- cream of tartar
- flavouring
- colouring
- vegetable oil

If you want to add flavour or colour to your sweets, you need to do this at the end of the boiling stage - add few drops of food essence (mint, lemon or something similar) and few drops of food colouring to compliment the flavour.
Don't try to add too much otherwise the sweets might taste a bit chemical.
Apart from a shop-bought flavour essences, you can also use homemade flavoured sugars, which have a concentrated flavour. I've used my cardamom or earl gray sugar syrup before and my chocolate syrup is also a great way to flavour boiled sweets.

Instructions & method
Gently heat the sugar, liquid glucose and water in a heavy saucepan, stirring with a wooden spoon until the sugar has dissolved.
Add the cream of tartar, bring to the boil and cover and boil for 3 minutes. Time the 3 minutes if you can. Then uncover and boil until the temperature reaches 143 C (the soft crack stage).
Keep an eye on the thermometer, it takes anything up to 5 minutes to reach that temperature.
Don't stir the sugar at this stage, otherwise it will crystallise.
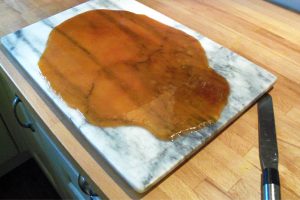
Pour the syrup on to the oiled marble slab and leave it to cool for a bit.

As the syrup cools lift the edges with an oiled palette knife and fold them into the centre. You need to do this several times, especially if your marble is not big enough and the syrup keeps running away.
So far, so good, but now comes the tricky bit.
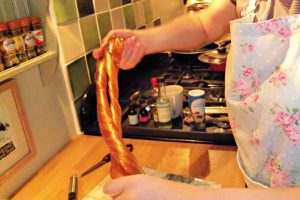
You need to oil your hands and start working with the syrup by pulling it and twisting in at the same time.
And you need to work really fast - not only because the syrup cools down quickly, but also because it's really hot! Keep your hands oiled - it will help with the heat and you really don't want the hot syrup to stuck to your hands.

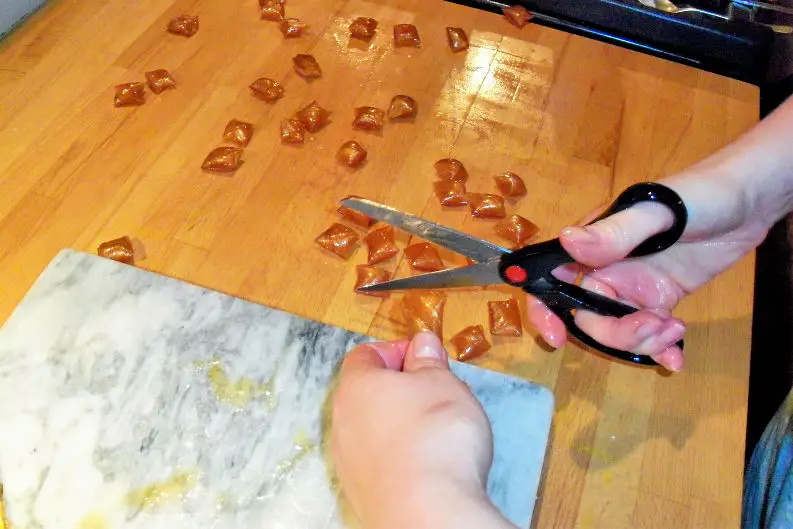
Keep pulling the mass of syrup and you will see that it becomes opaque - paler in colour and it will change to satin finish.
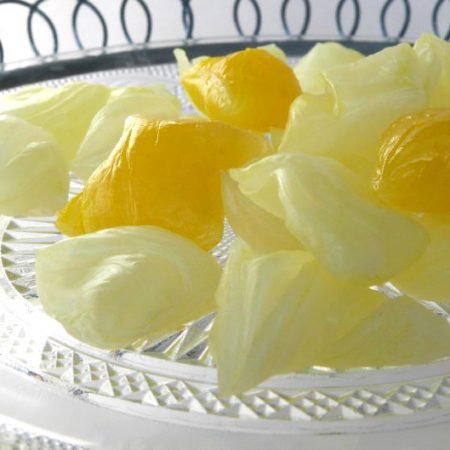
When this happens, you need to be ready with oiled scissors and start cutting the rope up to a small (about 1cm) pieces.
Traditional boiled sweets troubleshooting tips
How do you fix sticky hard boiled sweets?
This is really tricky, because the likely culprit here is a humidity in your kitchen or general environment. It, unfortunately, reacts with the sugar in the hard boiled sweets and can turn them sticky. The best thing to do is to wrap your sweets immediately as you make them.
This way the humidity won't have as much chance to get in. I usually keep my wrapped sweets in another air-tight container with either food suitable silica gel packets or freshly bought rise (which keeps the humidity absorbed within rather than getting into my sweets).
Why do my hard boiled sweets turn yellow when I make them?
This can be caused by lots of different reasons, but one that's most likely one is that you've left the sugar on heat for little bit longer than necessary.
Sugar is formed with both fructose and glucose, which tend to caramelise at different temperatures. Fructose begins to caramelize at 100 C and glucose at 150 C, so the more sucrose molecules break down into glucose and fructose, the greater the risk of your sugar yellowing.
Sometimes this affect the flavour too, because you are starting to caramelise the sugar. Once it happends there is not much you can do about it.
The best solution is to go with the flavour and add caramel, coffee or vanilla as a supporting flavour and colour your sweets brown or yellow. A little bit of caramelised flavour and colour is not going to hurt them and they will taste amazing.

Batch size
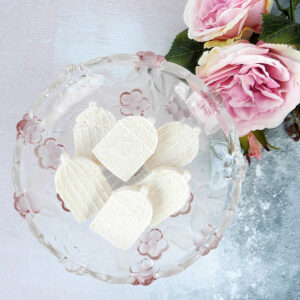
This recipe makes about 30-50 sweets, depending on size.
I wouldn't recommend to double up the recipe, as it usually means adjusting the boiling time and the size of the pan.
How to store hard boiled sweets
I store mine sweets in airtight jam jar and didn't need to wrap them into anything at all.
If they are perfectly made (e.i. the sugar was at the right temperature when you took it off the heat), the sweets stay 'dry' to the touch and will not go 'soggy' unless you leave them out for too long.
I kept one jar for quite a while and they were still fine and perfectly tasting (and dry) few weeks after I made them.
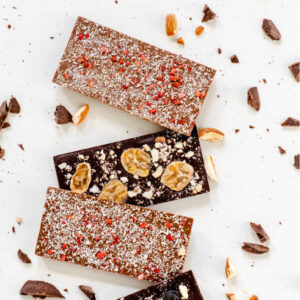
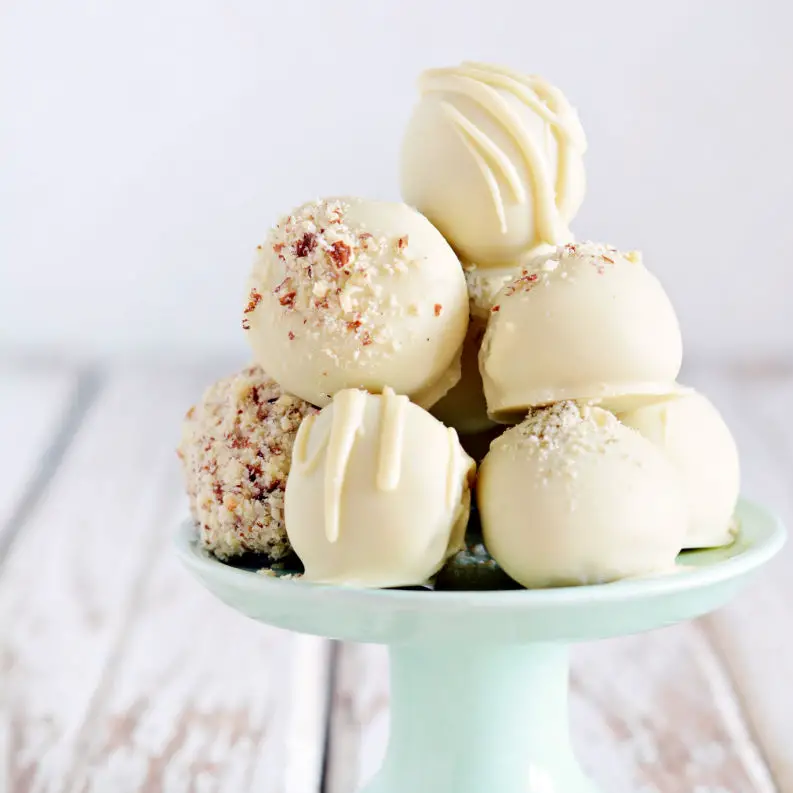
More confectionery inspiration

This recipe and me
When I first made this boiled sweets recipe, I was quite slow and by the time I got to the stage of cutting the sweets up, the syrup was too cold for me to cut them properly, so I just broke them up in pieces. You can also make longer twisted rock sticks.
This boiled sweets recipe is not for the faint hearted and I would not recommend it to somebody who has never worked with boiled sugar before, but it can be done and I'm a living proof that you can make boiled sweets at home. And if you like experimenting - then this recipe is definitely for you!
If you are brave enough to try these at home, I would love to know how you get on - leave me a comment - I'd like to hear from you!
PS. Not quite sure where to get the right equipment?
I've done the research for you and here is my traditional sweets resource page, where you can find everything you need to start making your own sweets at home. I've also done quite a bit of research into Victorian Sweets, which is an era where traditional boiled sweets were invented and perfected.
If you've liked this recipe and fancy trying another one, here is my Candy Cane Recipe with step by step instructions.
Why not stay in touch...
I hope you enjoy making this recipe and if you do, I'd love to know what you think! Let me know in the comments below or find me on Instagram or Facebook and add the hashtag #cocoaandheart so that I can see your post.
Or why not subscribe to my weekly newsletter with new recipes and baking tips straight to your mailbox.
Magdalena
Traditional Boiled Sweets
Ingredients
- 450 g granulated sugar
- 150 ml water
- 15 ml 1 table spoon liquid glucose (any supermarket stock these in the baking section)
- 1/4 teaspoon of cream of tartar
- Vegetable oil
Instructions
- Gently heat the sugar, liquid glucose and water in a heavy saucepan, stirring with a wooden spoon until the sugar has dissolved.
- Add the cream of tartar, bring to the boil and cover and boil for 3 minutes. Time the 3 minutes if you can. Than uncover and boil until the temperature reaches 143 C (the soft crack stage). Keep an eye on the thermometer, it takes anything up to 5 minutes to reach that temperature. Don't stir the sugar at this stage, otherwise it will crystallise.
- Pour the syrup on to the oiled marble slab and leave it to cool for a bit. As the syrup cools lift the edges with an oiled palette knife and fold them into the centre. You need to do this several times, especially if your marble is not big enough and the syrup keeps running away.
- So far, so good, but now comes the tricky bit. You need to oil your hands and start working with the syrup by pulling it and twisting in at the same time. And you need to work really fast - not only because the syrup cools down quickly, but also because it's really hot! Keep your hands oiled - it will help with the heat and you really don't want the hot syrup to stuck to your hands.
- Keep pulling the mass of syrup and you will see that it becomes opaque - paler in colour and it will change to satin finish. When this happens, you need to be ready with oiled scissors and start cutting the rope up to a small (about 1cm) pieces.


I’ve made this recipe today and my kids really loved creating different flavours and helping me to cut the sweets. Thank you for sharing the recipe!
The perfect recipe to make on a Sunday afternoon! I’ve used lemon flavouring and also made some strawberry ones – everything disappeared very quickly and the flavours were really good. I was a bit worried about all that boiling sugar, but I did everything very slowly and it was all fine.