Easy to make chocolate pudding baked in a mug using a microwave. Super simple recipe, which is quickly measured with spoons and take no more than 5 minutes to put together and bake. Perfect indulgent chocolate pudding treat for one!
Why make this recipe?
- Quick chocolate pudding, ready in 5 minutes
- The basic recipe can be used with any type of flour (e.g. can be made gluten-free)
- Big enough to share or makes one large mug
My top tips on making this recipe successfully the first time round
There is not much that can go wrong with this recipe, the only thing that can surprise you is how quickly the pudding is cooked in the microwave.
PIN & KEEP FOR LATER
MORE CHOCOLATE PUDDING RECIPES
What exactly is chocolate pudding in a mug
This is a miniature version of a normal cake made in cup or a mug suitable for microwave use and baked (cooked) in a microwave.
Depending on what recipe you use you can have chocolate pudding that taste like a cake or you can add chocolate in the middle which will melt into a sauce. You'd eat the pudding straight from the mug, topped with cream, chocolate sauce, ice cream or just on it's own.
Any specialist equipment needed?
You'll need a microwave, suitable mug and measuring spoons. The quantities are so small for this recipe, that measuring spoons (or just normal spoons if you don't have anything else) are best to use.
Ingredients & Possible Substitutions
Cocoa powder
Use the best cocoa powder you have as the flavour of your pudding will depend on it. You can use cocoa powder alternatives, such as carob powder or melt in chocolate chips, but the recipe might taste and behave slightly differently if you do.
Golden syrup
Mixed with the cocoa powder golden syrup makes a delicious chocolate sauce at the bottom of your chocolate pudding. You can also use honey, maple or agave syrup or my homemade brown sugar syrup, which adds extra flavour to the cake.
Flour
I've used self-raising flour to make things easier, but you can use plain (all-purpose, cake) flour to make this chocolate pudding. Don't forget to add about 1/4 - 1/2 teaspoon of baking powder (or you can mix it with baking soda).
Gluten free flours that work well with this recipe
- Any ready made up self-raising plain gluten free flours
- Any ready made up plain gluten free flours (just add a 1/4 teaspoon of baking soda and 1/4 teaspoon of baking powder)
- Spelt Flour
- Kamut Flour
- Buckweat Flour
- Coconut Flour
- Any other gluten free flour that you like.
- You can also mix your flours to experiment with a flavour.
Unlike with gluten free cake baking, where you need to have xantham gum to replace the gluten to hold everything together, you don't need to worry about gluten replacement in this recipe. The cup will hold everything just fine!
Sugar
I've used caster sugar, but dark, brown or light brown sugar, coconut sugar or coconut sugar substitutes would work well too. If you want darker, richer flavour, just use darker sugar.
Egg
This recipe uses egg, so it's not a vegan friendly, but you can leave out the egg and replace it with a tablespoon of flaxseeds (or chia seed mixed with water and prepared in advance).
Another option is to replace the egg with 1/2 large banana, which will help with the egg replacement and also add a great flavour.
If you want to leave the egg out completely (for whatever reason) try my No Egg Chocolate Mug Cake Recipe, which is super easy to make and has very light texture.
Oil
You can use any kind of oil, sunflower, vegetable or coconut oil, margarine or even normal butter.
Milk
Any kind of milk is fine with this recipe. Dairy free milks that work well with this recipe are:
- Coconut Milk
- Oats Milk
- Rice Milk
- Soya Milk
You can even use water for this recipe instead of milk as it's such a small quantity. Milk will make this recipe slightly more tasty, but it's a very small amount to make any big difference.
Chocolate
You can use any kind of chopped-up chocolate or milk or dark chocolate alternatives, chocolate chips (for baking) or ruby chocolate buttons. You can even use any kind of flavoured chocolate bars, such as caramel, mint or peanut butter or flavoured or regular chocolate melts.
MORE CHOCOLATE PUDDING RECIPES
- Chocolate Smoothie Bowl >>
- Chocolate Milk Pudding (no gelatine) >>
- Chocolate Flummery (Traditional Oats Pudding) >>

How to make chocolate pudding in a mug recipe
Divide 1tbsp cocoa equally between two standard mugs. Add 1tbsp golden syrup (or honey) to each; mix to a paste. Measure flour, caster sugar and remaining 1½tbsp cocoa into a medium bowl. Crack in egg, and add oil and milk. Mix well, then stir in white chocolate.
Divide mixture equally between mugs, then microwave on full power (800W) for 2 min. Serve in mugs, or turn on to a plate, adding cream or ice cream, if you like. You can leave out the white chocolate or swap it for different type of chocolate.
This simple chocolate pudding recipe is actually very handy, because you can make just a small amount at the time, rather than baking a whole cake. I found it particularly useful recently when I discovered that I suffer from IBS and can't tolerate very well gluten, dairy and certain types of sugar.
I've been adapting this recipe to suit my diet and since it makes two portions, my husband is more than happy to have the second serving.
Dietary requirements & how to adapt this recipe to your diet
Gluten-Free (use gluten free flour and make sure that the chocolate you use is gluten-free too)
Dairy-Free ( use plant based milk)
Vegan (use plant based oils, milk and swap the egg for flaxseed or banana
Vegetarian - use plant based oils and milk
Low in sugar (lower the amount of sugar by at least half and use natural sugar such as Stevia, monkfruit or maple syrup)
Nut-free - this recipe is nut-free
Flavour options for my chocolate pudding in a mug recipe
Orange Chocolate Mug Cake (with filling) - Add a large table spoon of homemade Orange & Lime Marmalade to the batter as you are scooping it out to the mug to microwave it and infuse it with an orange zest or orange zest substitutes to get the orange flavour coming through the chocolate.
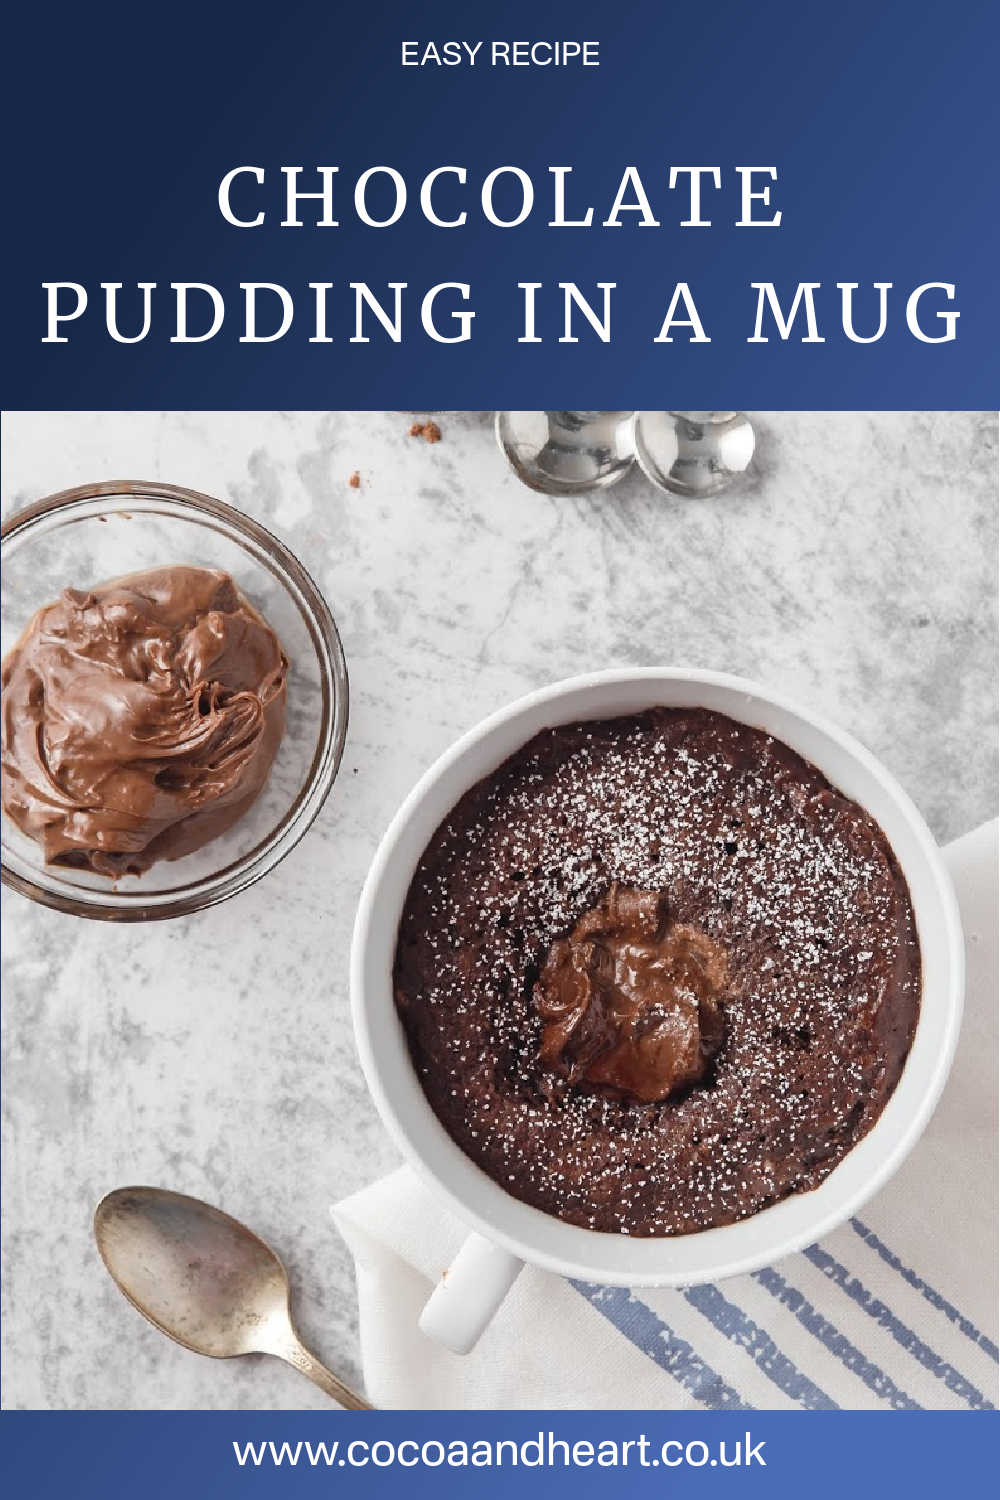
Praline Chocolate Pudding - add large table spoon of Nutella or other hazelnut chocolate spread to the batter by adding the spoonful in between 2 tablespoons of the pudding batter and then cover with the rest of the batter.
Cherry & Chocolate Pudding - add a few morello cherries (without pips) into the chocolate batter. You can use dried or fresh morello cherries. I've previously used cherries in syrup (and soaked in brandy. Once made, you can also use one or two cherries on top of your chocolate pudding.
Peanut Butter Chocolate Pudding - add large table spoon of peanut butter to the batter by adding few spoons of the batter first and then cover with the rest of the batter.
Biscoff Chocolate Pudding - ad large tablespoon of biscoff spread to the batter, by adding few spoons of the batter first and then cover it with the rest of the batter.
MORE CHOCOLATE PUDDINGS
Serving size & can I scale up or down this recipe?
This recipe makes 2 medium size chocolate puddings, so it's perfect to share with somebody. If you have some serious chocolate cravings, this recipe is slightly bigger for just one person, but you can always finish the pudding later!
You can double up the recipe, but I'd still split it to 4 mugs to cook. To make sure that the mugs bake evenly, I would use a spoon to spoon out the mixture (or even use a weighting scales). If you can fit 4 mugs to your microwave, you only need to increase the amount of time to about 3-4 minutes.
How to serve chocolate pudding in a mug
This chocolate pudding is great on it's own, but even better served with vanilla ice cream, salted caramel sauce, chocolate syrup or whipped cream.
This chocolate pudding also goes well with homemade fruit curds, especially with Lemon or Raspberry Curd.
I've also served it with fresh raspberries, compoted cherries or blackberries - all these fruit flavours go really well with the chocolate.
This chocolate pudding in a mug is also great with any leftover chocolate ganache. I always have leftovers of various flavours, since I make chocolate truffles all the time and the chocolate sponge pudding base works great with practically any flavour. If your ganache has hardened a little, just warm it up for 5 seconds in the microwave and spoon on top of your chocolate pudding.
Can this recipe be made in advance?
This pudding is best eaten hot, so it's difficult to prepare it in advance. It's so quick and easy to make, that you don't need to worry about preparing anything ahead of time.
How to store this chocolate pudding if you have any leftovers
This chocolate pudding goes a bit gooey when it cools down, so it's best to eat it straightaway. If you had any leftovers left, just keep them wrapped somewhere cold and eat within the next 24 hrs. To make the pudding soft again, just heat it in the microwave for about 5-10 seconds.
This recipe and me
I was recently invited to demonstrate my cooking skills to new students at a local college in Greenwich (London).
I thought this was going to be an easy task and started to gather my favourite simple recipes. That was until I read all my instructions and to my dismay found out, that the new college accommodation didn't include ovens in the student's communal kitchen design.
I suppose it makes sense - students are there just for a short time and most of their student's life probably won't include slaving over roast dinners on Sundays!
But, for me - with a 'normal' kitchen - I'm used to using my microwave only to melt chocolate for my chocolate making, but not actually to cook or bake!
So, anyway after a mini melt down, I've accepted the challenge and pulled together a simple meal cooked just on a hob or in a microwave. And for pudding, I made this chocolate pudding in a mug.
And of course, in the interests of research I had to try this recipe several times to make sure the recipe worked. I'm happy to report that this indeed is the perfect end to a good meal - quick, gooey, chocolatey and since it's only made in a mug, you don't need to do much washing up afterwards.
Oven, who needs one!
Why not stay in touch...
I hope you enjoy making this recipe and if you do, I'd love to know what you think! Let me know in the comments below or find me on Instagram or Facebook and add the hashtag #cocoaandheart so that I can see your post.
Or why not subscribe to my weekly newsletter with new recipes and baking tips straight to your mailbox.
Magdalena

Chocolate pudding in a mug
Equipment
- mug suitable for microwave use
- spoons to mix & to measure
- microwave
Ingredients
- 2 tablespoons cocoa powder
- 2 tablespoons golden syrup honey, maple or agave syrup
- 2 tablespoons caster sugar
- 6 tablespoons self-raising flour
- 1 medium egg
- 1½ tablespoons sunflower oil vegetable or coconut oil
- 1½ tablespoon milk
- tiny pinch of salt
- 2 tablespoons chopped up chocolate or chocolate chips any flavour or type you like
Instructions
- If using two mugs, divide one tablespoon of cocoa powder equally between two standard mugs.
- Add 1 tablespoon of golden syrup (or honey) to each mug and mix to a paste.
- In a separate bowl mix together the self-raising flour, tiny pinch of salt, caster sugar and remaining 1 tablespoon of cocoa powder.
- Crack in the egg, add oil, milk and stir thoroughly.
- Stir in the chopped up chocolate.
- Divide the mixture equally between mugs, then microwave on full power (800W) for 2 min.
- Check that the pudding is done by sticking a wooden skewer in (if it comes out clean, the pudding is done). Alternatively, you can see when the pudding is done when it slightly comes away from the sides and the middle is nice and firm.
- Serve in mugs, or turn on to a plate, adding cream or ice cream, if you like.
Notes
This recipe was originally written on 26 July 2015 and last tested and updated on 26 April 2023


Leave a Reply