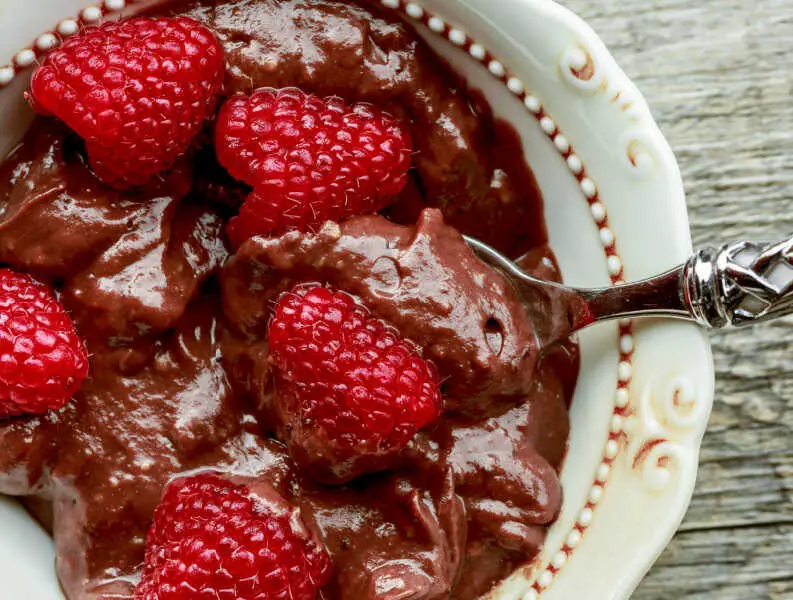
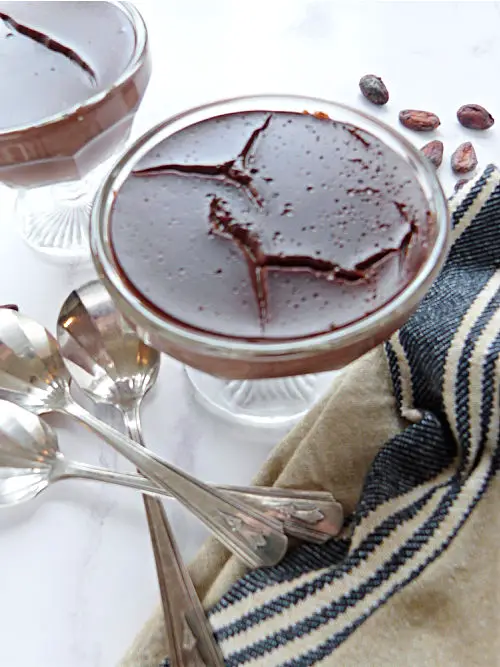
This chocolate milk pudding recipe is very easy to make and it’s the perfect after-dinner pudding. It’s perfect on it’s own and even better served with yoghurt, raspberries or crumbled biscuits.
Why make this recipe
- Quick and easy pudding recipe
- Can be made with any milk & you can mix any leftover milk or cream together
- No gelatin, this pudding uses cornstarch to set
- Suitable for vegetarian diets and vegan (if made with dairy-free milk)

MORE EASY PUDDING RECIPES
What to expect
This pudding is light in texture and taste with a very light flavour and sweetness. It looks and taste similar to blancmange, but it’s slightly firmer.
Although this milk chocolate pudding doesn’t contain any gelatine, it surprisingly doesn’t take as long as jelly to set.
Whilst it takes a little longer to make then a regular jelly dessert, you don’t need to worry like with jelly, about setting the jelly faster in the fridge or freezer. This milk pudding sets very easily.
You shouldn’t have any problems with taking the pudding out of the bowl or serving glass.
It’s the perfect treat for after dinner or a low sugar snack in the afternoon.
Ingredients & substitutions
Milk
You can use any kind of milk, but it will change slightly the flavour of the pudding. Fortunately chocolate has a fairly strong flavour so even if you use coconut or soya milk, it will overpower it.
If you want to make this pudding a little thicker and creamier, you can replace 50% of the liquid with cream. You can also mix any leftover milk together, which is what I normally do.
- Dairy Milk – skimmed, semi-skimmed or full-fat
- Lactose Free milk
- Soya milk
- Coconut milk – I found that I need to use less milk othewise the pudding doesn’t thicken
- Oat milk
- Almond milk
Cornflour
You can use cornflour, cornstarch or potato starch. They will all work the same way. If you want your pudding to be a little firmer, add more cornflour. I sometimes use corn starch or potato starch to firm up my homemade fruit curds, because some flavours can be trickier to set without it.
One practical note about the cornstarch in the recipe. The cornstarch is best mixed in a smaller amount of milk first and then added into the rest of the milk.
Because it can be quite difficult to make the whole thing nice and smooth I use a metal whisk for the whole process. It makes things much easier.
Sugar
Sugar is completely to taste, which means you can add more or less. You can also use alternative sugar substitutes, such as honey or maple syrup.
Salt
Salt is optional, but I’d like to think that it helps with the flavour of the pudding.
Cocoa powder
You are welcome to use cocoa powder to your taste. I find that 2 tablespoons is enough for a mild chocolate flavour, but you can add an extra spoon if you feel that it needs more. If you are not sure, you can always taste the cold mixture before you start to boil it.
You can also use any of the cocoa powder substitutes, such as:
- Chocolate bar (milk, dark, white) (decrease the amount of sugar if using milk or white chocolate)
- Carob powder
- Chocolate chips
- Candy melts
- Drinking chocolate (use a little less sugar if your drinking chocolate includes some and increase the amount of the powder)
PUDDING RECIPES
Method
There are basically two ways of making this recipe. First is all in one method, which is perfect if you have a ball whisk. The second method makes this recipe in two stages and is perfect if you just have a wooden spoon.
All in one method
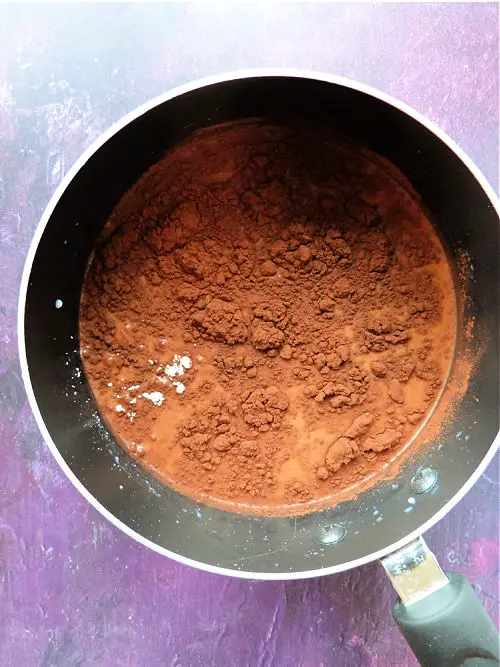
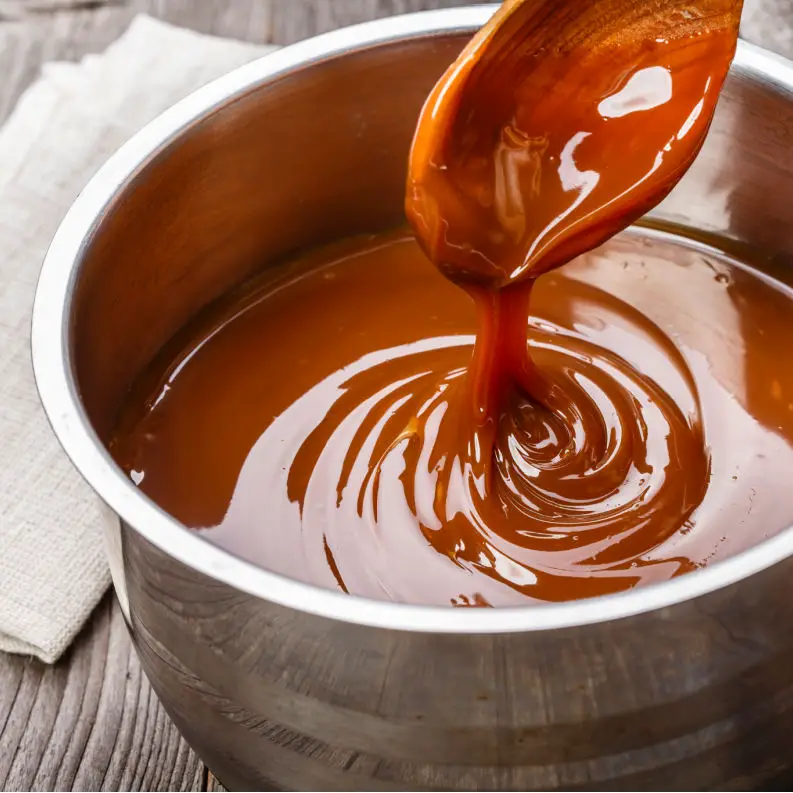
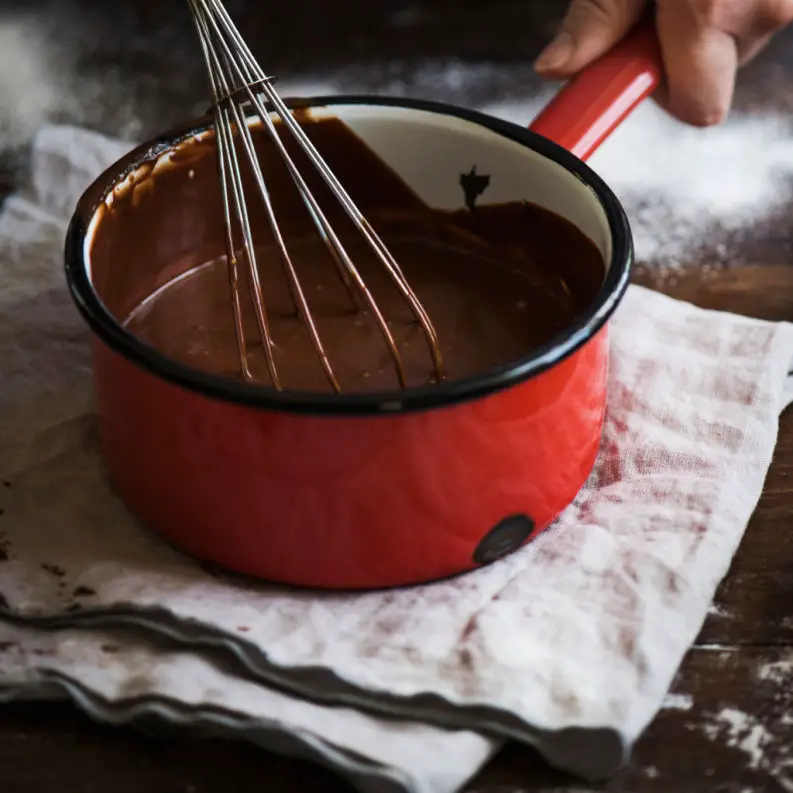
Pour the milk in to a large saucepan and add the cornstarch, cocoa powder, sugar and a tiny pinch of salt to the milk and mix with a whisk until it’s completely smooth.
Bring the milk slowly to the boil, stirring occasionally and making sure that the sugar has dissolved completely.
Boil for 2 minutes, whilst slowly whisking/ stirring the milk. The mixture will start to thicken very quickly at this point. Carry on boiling until bubbles appear on the top and the whole mixture is nice and thick. This usually doesn’t take more than a minute.
Pour straightaway into pudding bowls or glasses and leave a little gap on the top for your choice of toppings.
Two stages method
Pour the milk in to a large saucepan and bring gently to a simmering point. Don’t boil!
Pour about 1/3 of the milk into a large jug or a bowl.
Add the cornstarch to the milk in the bowl and mix with a whisk until it’s completely smooth.
Add the cocoa powder and whisk or mix again.
Add the sugar and tiny pinch of salt to the saucepan with the majority of the milk.
Bring the large amount of milk slowly to the boil, stirring occasionally and making sure that the sugar has dissolved completely.
When the milk is nearly simmering, pour the remainder of the milk with the cornstarch in and continue to stir with a whisk. Work fast, as the mixture will thicken very quickly at this point. Carry on boiling until bubbles appear on the top and the whole mixture is nice and thick. This usually doesn’t take more than a minute.
Pour straightaway into pudding bowls or glasses

How to store milk pudding
Leave to cool down at room temperature and then place in the fridge for a further hour or so.
Best served on the same day or within 2-3 days (max). Keep in the fridge and serve straight from the bowl or gently turn out on the plate and add your toppings (if using).
I’ve never tried to freeze this chocolate milk pudding, because I think it would probably disintegrate when defrosted.
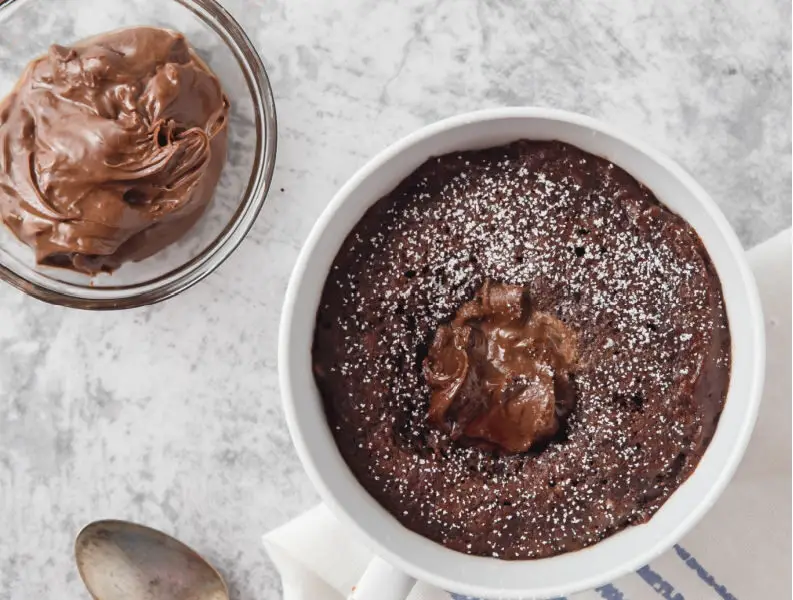
Milk chocolate pudding toppings
You can easily serve this pudding as it is, but if you want to make it a bit fancier, here are a few suggestions:
- Whipped cream
- Yoghurt
- Raspberries
- Cocoa nibs
- Sweets
- Sugar syrups or molasses
- Ice-cream or sorbet (for example my homemade chocolate sorbet)

Troubleshooting & FAQ
I don’t like a ‘skin’ on my pudding, what can I do?
Normally if you leave your pudding to cool down in a room temperature it forms a skin on the top. If you are not too keen on this, you can put a cling film or a plastic bag over the bowl and tightly wrap it. For best results, place the cling film directly on the top of the pudding straight after you pour it and then leave it to set.Add image
I get lumps in my milk pudding, what can I do to get rid of them?
The best thing is to whisk the cornstarch into about 1/3 of the milk first and then pour into nearly boiling milk (see my notes for the 2nd method). It also helps to have a whisk instead of wooden spoon to stir/whisk your pudding as you make it.
My pudding is too runny, when using non-dairy milk, what’s happening here?
Oh, yes, forgot to mention, that, when you use plant based milk, they seem to behave differently. I’ve noticed that I either need to boil the pudding for longer (reducing the amount of liquid) or add more cornstarch to get the pudding to set properly.
I think, I’ve burned my milk pudding, can I save it?
That’s a tricky one! If you notice the burning soon enough, take the saucepan from the heat and pour the top part into your prepared bowls. Don’t scrape the bottom of the saucepan and if you see bits that are already burned, leave them in the saucepan.
If you don’t notice the milk burning straightaway, it might be too late and you might need to throw the whole pudding away. Before you do that, carefully taste it and if it’s at least a bit edible, spoon out what you can and dispose the rest.
Unlike other food, when you burn milk the burned flavour goes through the whole dish and it’s quite difficult to do anything about it.
I’ve noticed that the creamier the milk is the easier it is to burn it, so if you want to prevent it, you can always use a plant-based milk.
Another option is to use a bain marie (a saucepan with boiling water and a heat proof bowl on the top.) This way, you won’t be cooking on a direct heat and you should be able to prevent any burning before it happens.
This recipe & me
There is not a lot of things I wish I knew when I was little, that I know now. I suppose I was quite happy go lucky child. But, one thing I truly wish I knew was that you can make milk pudding without a shop-bought packet! That all you need is just cornstarch and you can create any flavour you like! Sounds like a silly thing, but this would have revolutionised my childhood!
Me and my brother were always baking together and one pudding that we could never have enough of was a milk pudding. We would make all the flavours, which wasn’t that difficult since there was only chocolate, vanilla and raspberry.
We would layer plain biscuits at the bottom of a large bowl and then make one layer at a time, always waiting until the previous layer cooled down. The waiting for the last layer to cool down and set was excruciating because all we wanted to do is to just dive in! This was usually a weekend ‘project’, but when we wanted something quick we made just one flavour and used small sundae glasses.
When I moved to London, I was quite happy to explore other foods and flavours. You know, women can’t live on milk pudding alone and all that!
Milk pudding didn’t come under my radar again until last year when my friend took a job in America and her little daughter was very disappointed when she realised that she won’t be able to buy the milk pudding sachets in USA.
I’ve started to research different recipes and finally came up with a combination that worked and tasted like the real thing. I’ve made one little girl very happy and re-discovered my long lost love for milk pudding too!
LIKE THIS RECIPE? PIN IT FOR LATER

Why not stay in touch…
I hope you enjoy making this recipe and if you do, I’d love to know what you think! Let me know in the comments below or find me on Instagram or Facebook and add the hashtag #cocoaandheart so that I can see your post.
Or why not subscribe to my weekly newsletter with new recipes and baking tips straight to your mailbox.
Magdalena

Chocolate Milk Pudding
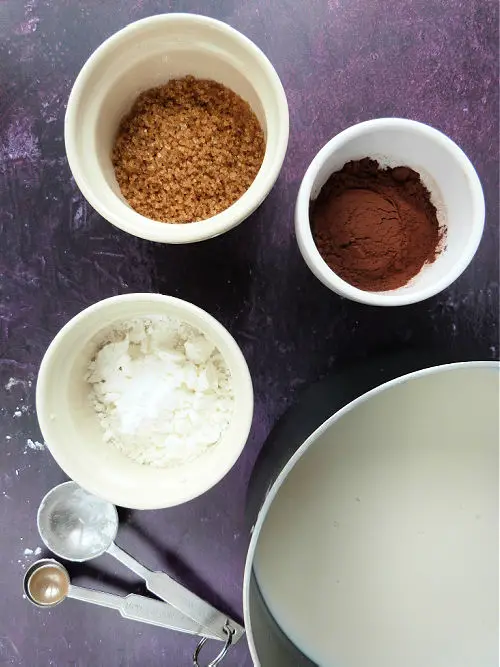
Ingredients
- 500 ml milk any type of milk including dairy free
- 2-3 tablespoons cocoa powder to taste
- 4 tablespoons cornflour approx 30 grams
- 3-4 tablespoons sugar to taste
- tiny pinch salt
Instructions
- Pour the milk in to a large saucepan and add the cornstarch, cocoa powder, sugar and a tiny pinch of salt to the milk and mix with a whisk until it's completely smooth.
- Bring the milk slowly to the boil, stirring occasionally and making sure that the sugar has dissolved completely.
- Boil for 2 minutes, whilst slowly whisking/ stiring the milk. The mixture will start to thicken very quickly at this point. Carry on boiling until bubbles appear on the top and the whole mixture is nice and thick. This usually doesn't take more than a minute.
- Pour straightaway into pudding bowls or glasses and leave a little gap on the top for your choice of toppings.
- Leave to cool down at room temperature and then place in the fridge for a further hour or so.
- Best served on the same day or within 2-3 days (max). Keep in the fridge and serve straight from the bowl or gently turn out on the plate.


What a fab, simple recipe! Will definitely be trying this with The peas! Thanks for sharing with #CookBlogShare 🙂
I love chocolate pudding! I will be giving this a try!