This dairy-free chocolate syrup recipe is made in old-fashioned way by boiling sugar with water and adding cocoa powder and vanilla for flavour. It's still an easy recipe to make and a great homemade version of a shop bought chocolate syrup or a sauce.
I always make this recipe when I want traditional chocolate sauce to drizzle over desserts and pancakes and in our family, it's everyone's favourite. When I was making this recipe last time, I realised that it's naturally dairy free, so it's perfect for all my vegan friends and anyone who is sensitive to dairy.
Why make this recipe?
- Great tasting chocolate sauce
- Ideal consistency to use as chocolate syrup for puddings, desserts, ice-creams, pancakes etc.
- Perfect homemade gift for your friends and family
- Easy to make recipe with simple ingredients
- Cheaper than shop-bought chocolate sauce
- Dairy-Free & suitable for vegan diets
PIN & KEEP THIS RECIPE FOR LATER

MORE VEGAN RECIPES
What's the difference between chocolate syrup and chocolate sauce?
The main difference is the use of cream (or not), the thickness of the texture and the use of the syrup. Although it seems that the use (drizzling on puddings or ice creams) is the same for both.
Chocolate syrup
Traditionally made with a lot of sugar, water and cocoa powder. It's usually much thinner (runnier) than chocolate sauce, but perfect for drizzling over pancakes or adding to your coffee.
Lasts much longer than a chocolate sauce, as there isn't really anything that can go 'off' in this recipe.
Chocolate sauce
Usually made with cream and whole chocolate and might not have that much sugar (if any) in. Can be easily made from milk, dark or white chocolate. Doesn't last as long as the chocolate syrup, because it usually contains cream (has to be stored in the fridge and used within few days). It's usually much thicker than chocolate sauce.
My top tips on making chocolate syrup at home successfully the first time round
Let the sugar dissolve properly before you start to boil the mixture. Check with a back of a spoon if you can see any sugar crystals. If not, you are ready to go.
Don't stir too much once you start to boil the syrup as this will re-form the sugar crystals and makes them only stronger (e.g. you get a gritty syrup)
Add salt to your taste! Sugar is very bland ingredient and it does need salt to bring out the flavour
Don't substitute the cocoa powder - use the best cocoa powder you have to make sure that your chocolate sauce has a great flavour.
My favourite pro tip
If the chocolate taste is not as strong as you'd hoped for, add a 1/2 teaspoon of coffee granules dissolved in a tiny amount of water. This works like a magic!
The coffee granules (can be de-caff if you are making the syrup for the whole family) intensify the flavour of the chocolate. If you add only a 1/2 teaspoon of coffee granules, the sauce will not taste like coffee.
What makes this chocolate syrup recipe work?
Without a doubt, it's the salt and using a good quality cocoa powder.
Any specialist equipment needed?
Nothing specific, just a medium sized saucepan. No need for a thermometer.
Time saving tip
If you are thinking of making this chocolate syrup as a present, double or triple the quantity to make more syrup at the same time.
MORE VEGAN RECIPES

Ingredients & Possible Substitutions
Sugar
I've used granulated white sugar for this recipe - it's easy to get hold of and the cheapest of all the different types of sugars.
Saying that if you wanted to make your chocolate syrup stronger in flavour and slightly richer you can also use light brown sugar.
You can also use 50% white and 50% dark sugar, but anything else (like demerera sugar, coconut sugar or coconut sugar alternatives) is going to overpower the cocoa powder and the whole thing might not taste as chocolatey as you'd like it too.
Cocoa Powder
I've used unsweetened cocoa powder for this recipe, but other cocoa powder substitutes such as baking cocoa powder or Dutch cocoa powder will also be fine. It's best not to use drinking cocoa powder as these already contain milk and sugar and won't give you as much flavour you need.
If you want you can use carob instead of cocoa powder. I'd add a tiny bit of instant coffee granules to help with the flavour or leave them out for more natural lighter chocolate flavour.
Salt
I always add salt to chocolate as it' brings out the flavour really nicely. You might need anything up to 1/4 teaspoon of salt, depending on your taste buds. I usually add a large pinch of salt first and then add more if needed at the end of the recipe when I've added the vanilla extract. At that stage the syrup is just warm and easy to taste, so you can finish the flavouring without any problems.
Vanilla Extract
I use qood quality extract or vanilla paste. If you don't have anything else, use vanilla essence, but they are normally not very strong and you need to add quite a lot to taste the vanilla.

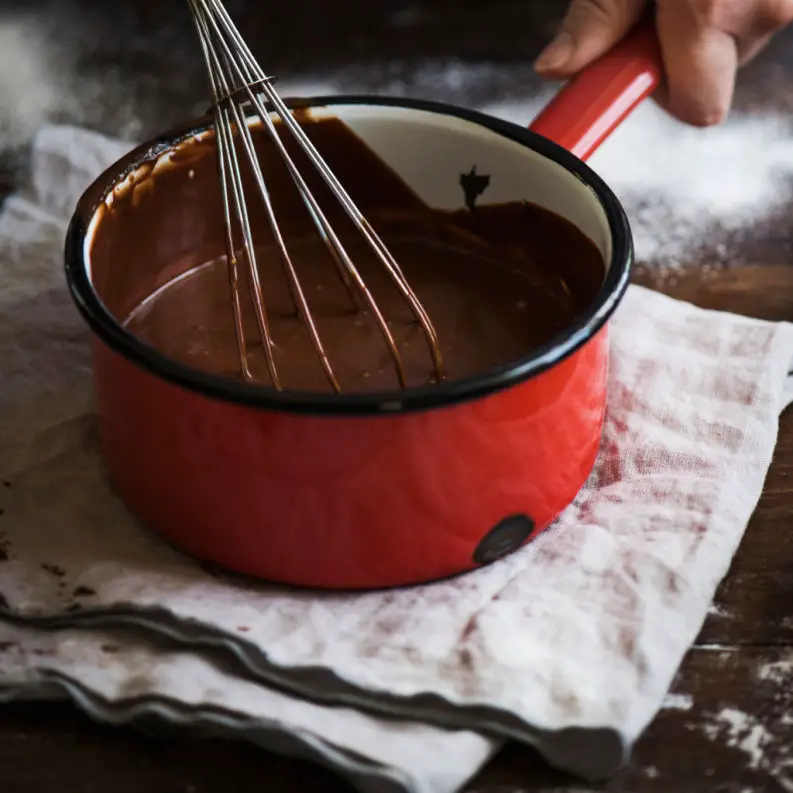
How to make homemade chocolate syrup
- Measure out the cocoa powder and sugar and mix in a saucepan, making sure that the cocoa powder is completely incorporated into the sugar.
- Add cold water and a large pinch of salt and mix well with a wooden spoon.
- Place on a very low heat and let the sugar slowly dissolve first.
- Once the sugar is dissolved, increase the heat to medium/high and bring the syrup to boil.
- Keep the syrup boiling until it thickens a bit. Stir if necessary to prevent the syrup from burning, but try to resist to stir constantly.
- Once you are happy with the syrup thickness, remove the saucepan from the heat and either leave to cool in the saucepan or pour into a mixing bowl and leave to cool down.
- Add vanilla extract and taste to check the flavour. If needed you can add more salt, but dissolve it completely in a tiny bit of water.
- Pour the chocolate syrup into a bottle, jar or a squeeze bottle and store in the fridge.
Dietary requirements
This homemade chocolate syrup recipe is:
- Vegan
- Vegetarian
- Dairy Free
- Soy-Free
This chocolate syrup is perfect with:
- Chocolate Mug Cake (without egg) >>
- Chocolate & Pear Tart (no bake cake) >>
- Easy Chocolate Brownies >>
- Chocolate sorbet >>
- Chocolate flummery pudding >>
- Vegan chocolate pancakes >>
- Biscoff & Chocolate Cheesecake >>
- Sourdough Chocolate Pancakes >>
How to use chocolate syrup
- Simply drizzle on any pudding, ice cream, or pancakes
- Mixt it with hot milk to make a hot chocolate drink
- Make it into a cold chocolate milkshake
- Use is as a dipping sauce for strawberries, bananas, churros, pretzels or biscuits
- Add to coffee to make choco mocha
- Add to buttercream to make chocolate buttercream
Batch size
The syrup is going to reduce a little, but it will still give you around 350 ml of chocolate syrup (about 1 cup plus 1/2 cup approx), which will be enough for 2 medium sized jam jars.
Scaling up or down this recipe
You can easily scale up this recipe, just double or triple the ingredients.
If you want to scale down this recipe, you can make a very small amount in the microwave.
Keeping the proportions the same helps here so 1 tablespoon of sugar, water, cocoa powder mixed in with a tiny amount of salt and a bit of vanilla extract and boiled in a small cup until it thickens a bit. This is perfect if you need really quick chocolate sauce.
MORE VEGAN RECIPES
Can the syrup be made in advance?
This chocolate syrup has a good shelf life, so making it up to 1 week in advance will be fine.
How to store chocolate syrup
Glass or plastic squeeze bottle works great, but any clean jam jar or airtight container will be find too. Best kept in the fridge.
Shelf life
There is very little that can go off in this old-fashioned version of chocolate syrup, so as long as you keep it in the fridge, you should be fine for 2-3 weeks minimum.
Why did my chocolate syrup crystalised?
This is probably because the sugar wasn't properly dissolved before you've started to boil the mixture. It can also be because you might have stirred the syrup too much whilst it was boiling. Using a spoon with a leftover sugar could also be a problem, so make sure you use a clean one.
What do I do, when my chocolate syrup crystalised?
You can gently dissolve the sugar again by re-heating the syrup and adding extra water (1 tablespoon should be fine). If you are worried about the crystals re-forming again, add a tablespoon of glucose (corn syrup) to the mixture. Glucose or corn syrup (also honey) is a form of sugar, which helps to keep the sugar crystals apart.
Can you leave chocolate syrup out?
Ideally you want to keep the chocolate syrup in the fridge, but if you haven't got another way of storing it, it will be fine somewhere cold and out of the direct sunlight.
Can you serve the homemade chocolate syrup warm?
Yes, of course, just warm it up in the microwave or on the hob. Don't boil.
Why not stay in touch...
I hope you enjoy making this recipe and if you do, I'd love to know what you think! Let me know in the comments below or find me on Instagram or Facebook and add the hashtag #cocoaandheart so that I can see your post.
Or why not subscribe to my weekly newsletter with new recipes and baking tips straight to your mailbox.
Magdalena

Old-fashioned chocolate syrup (vegan, dairy-free)
Ingredients
- 200 grams sugar 1 cup
- 240 grams water 1 cup
- 100 grams cocoa powder 1 cup
- 2 teaspoons vanilla paste or extract optional
- large pinch salt or up to 1/4 teaspoon (depending on your taste) - optional
Instructions
- Measure out the cocoa powder and sugar and mix in a saucepan, making sure that the cocoa powder is completely incorporated into the sugar.
- Add cold water and a large pinch of salt and mix well with a wooden spoon.
- Place on a very low heat and let the sugar slowly dissolve first.
- Once the sugar is dissolved, increase the heat to medium/high and bring the syrup to boil.
- Keep the syrup boiling until it thickens a bit. Stir if necessary to prevent the syrup from burning, but try to resist to stir constantly.
- Once you are happy with the syrup thickness, remove the saucepan from the heat and either leave to cool in the saucepan or pour into a mixing bowl and leave to cool down.
- Add vanilla extract and taste to check the flavour. If needed you can add more salt, but dissolve it completely in a tiny bit of water.
- Pour the chocolate syrup into a bottle, jar or a squeeze bottle and store in the fridge.
This recipe was originally written on 30 March 2021 and last tested and updated on 19 February 2024


So simple and easy to make! I’ve run out of my regular chocolate syrup, so decided to make my own instead. I like that this recipe doesn’t use any cream, because that’s great for our family budget! I’ve been using this chocolate syrup sauce recipe for pancakes and puddings and everyone likes it!